Did you know that a minor bumper scratch can lead to $1,500 or more in repair costs?
Even small bumper damage might seem like a cosmetic issue at first, but it can compromise your car’s safety systems and lead to bigger problems down the road. Many car owners face this situation - you’re not alone.
We know how stressful dealing with car damage can be. That’s why we’ve put together this complete guide about repairing a car bumper, from spotting early warning signs to getting your vehicle fixed quickly and affordably.
Whether you’re dealing with a parking lot scratch or more serious collision damage, we’ll show you exactly what steps to take, when to try DIY fixes, and how to work with professionals for the best results. Let’s get your car back to its safe, pristine condition!
Signs Your Car Bumper Needs Repair
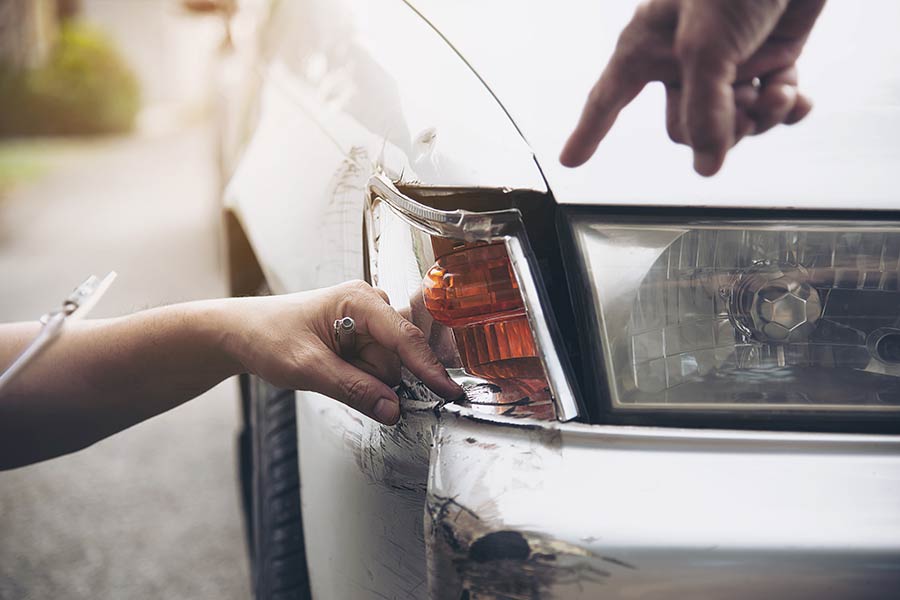
Let’s talk about the warning signs that tell you it’s time for bumper repair. As a car owner, I’ve learned that catching these signs early can save both money and hassle down the road.
Common types of bumper damage
Your bumper might be crying out for help through various signals. The most frequent issues I see include surface scratches and paint damage, which while common, shouldn’t be ignored. Deep dents or large cracks pose more serious concerns, as they can weaken your bumper’s protective capabilities. I’ve noticed that even small punctures can spread into larger cracks if left unaddressed.
Risk assessment guide
When checking your bumper’s condition, I recommend looking for these critical signs:
- Loose or misaligned positioning: Gaps between the bumper and car body
- Strange noises: Rattling or scraping sounds while driving
- Sensor malfunctions: False alerts from parking or collision systems
- Paint damage: Peeling, bubbling, or deep scratches
- Fastener issues: Bumper movement or vibration at higher speeds
When immediate repair is necessary
I can’t stress enough that some bumper problems need immediate attention. If you spot major cracks running through the bumper, this means its structural integrity is at risk. When your car’s safety sensors start giving wrong readings, this isn’t just an annoyance – it’s a serious safety issue that needs fixing right away.
Your bumper’s fasteners play a crucial role in keeping it secure. If they’re not holding properly, your bumper could fall off while driving. Also, if you notice that closing your trunk or hood has become difficult, this often points to bumper misalignment that requires professional attention.
Remember, your bumper is your car’s first line of defense in accidents. When it shows signs of reduced shock absorption after even a minor collision, that’s your cue to get it checked. Modern bumpers are designed with specific safety features, and any compromise in their function puts you and your passengers at risk.
Professional Repair vs DIY Assessment
I’ve seen many car owners struggle with this crucial decision: should you fix that bumper damage yourself or take it to a professional? Let me help you make the right choice.
When to attempt DIY fixes
I can tell you from experience that DIY repairs work best for minor cosmetic issues. Here’s when you can confidently tackle the job yourself:
- Small surface scratches without paint damage
- Minor scuffs that haven’t cracked the bumper
- Tiny dents that haven’t affected the paint
- Simple paint touch-ups on flat surfaces
Professional repair indicators
I strongly recommend professional help when you spot these signs:
Modern cars with Advanced Driver Assistance Systems (ADAS) need special attention. These systems use sensors behind your bumper, and incorrect repairs can make them malfunction. If your car has blind spot monitoring or adaptive cruise control, I always suggest professional repair.
Deep cracks, large dents, or damage near curved areas need professional expertise. I’ve seen DIY attempts on these go wrong, leading to more expensive fixes later.
Cost-benefit analysis
Let me break down the numbers for you. DIY repairs typically cost between $30-$100 for materials, plus $50-$200 for tools. But here’s what you should think about:
Time investment: A professional can complete repairs in hours, while DIY might take your entire weekend.
Quality guarantee: Professional repairs come with warranties and guarantees. They use specialized tools and exact paint matching techniques that aren’t available in DIY kits.
Long-term value: While DIY might save money initially, poor repairs can decrease your car’s value and compromise safety. Professional repairs maintain your vehicle’s worth and ensure proper function of safety systems.
Remember, if your bumper has sensors or cameras, professional repair is worth the investment. These components need precise calibration that DIY methods can’t provide.
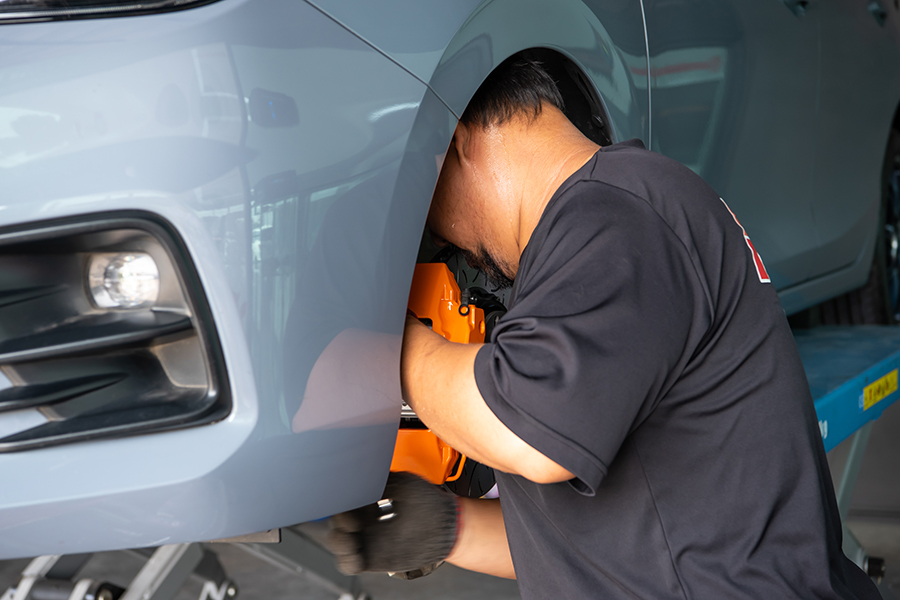
Steps in Professional Bumper Repair
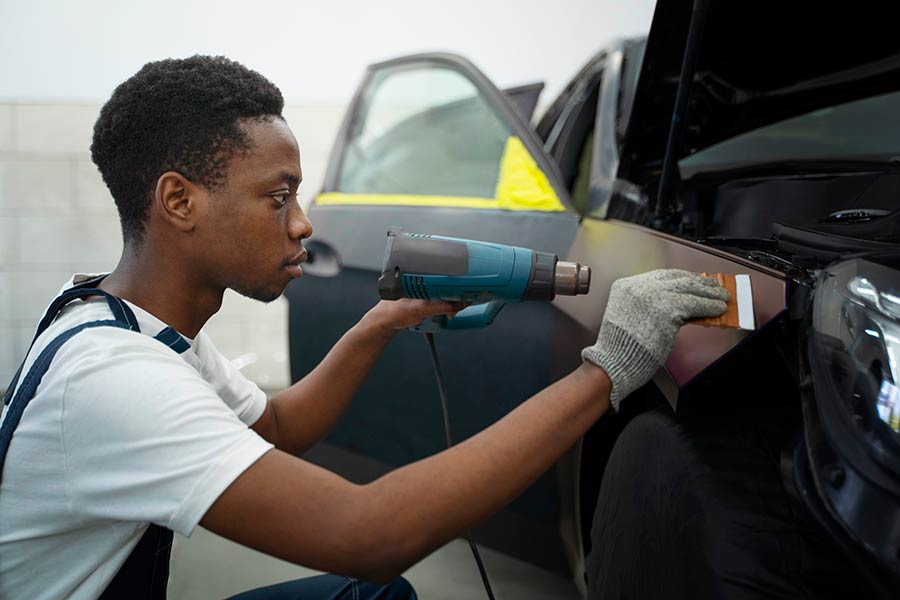
As a professional auto body technician, I want to walk you through the exact steps we take when repairing a car bumper. My years of experience have taught me that a systematic approach leads to the best results.
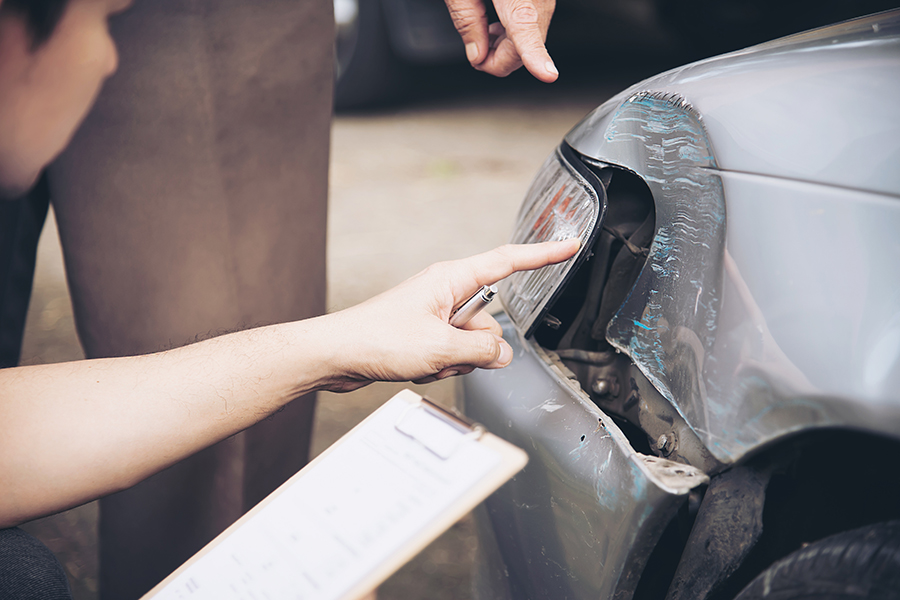
Initial damage evaluation
The first thing we do is perform a thorough damage assessment. Here’s our proven evaluation process:
- Remove the bumper to check hidden damage
- Look for cracks and structural weakness
- Test sensors and electrical components
- Check paint damage and material type
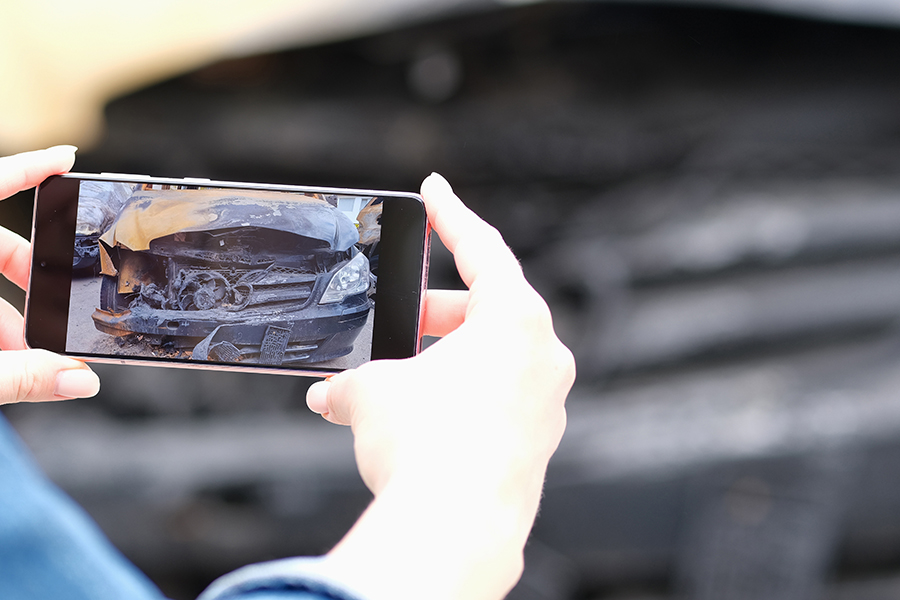
- Document all findings for precise repair planning
Repair methods and techniques
I start by identifying your bumper’s material - plastic or metal - as this determines our repair approach. For plastic bumpers, we use heat reshaping and plastic welding. When working with metal bumpers, we apply specialized hammering techniques and body fillers.
The repair process begins with cleaning and preparing the damaged area. I make sure to create proper adhesion surfaces by sanding and applying specific primers. For cracks, we work from both sides of the bumper, adding reinforcement materials where needed.
Paint matching and finishing
Paint matching is both art and science. We use advanced color-matching technology to get an exact match for your car’s paint. Here’s what makes our paint process special:
- Computer-aided color analysis for precise matching
- Multiple paint layers for depth and durability
- Special clear coat application for UV protection
- Professional spray techniques for seamless blending
I pay special attention to the paint application environment, controlling temperature and humidity for optimal results. The final step involves careful clear coat application and quality inspection under different lighting conditions to check for perfect color match and finish.
Each repair gets multiple quality checks throughout the process. I test the bumper’s alignment, sensor functionality, and paint match before considering the job complete. This attention to detail is what sets professional repairs apart.
Smart Ways to Save on Bumper Repair
Looking to save money on bumper repair without compromising quality? I’m going to share my top money-saving strategies that have helped countless car owners get excellent repairs at fair prices.
Insurance claims tips
I always tell my clients to think carefully before filing an insurance claim. Here’s why: If your repair costs are close to your deductible amount, paying out-of-pocket might save you money in the long run. I’ve seen many cases where minor bumper damage costs less than the deductible, and filing a claim could raise your premiums for years.
When dealing with insurance, I recommend checking if you have accident forgiveness. This feature can protect your rates from increasing after your first accident. Also, if another driver caused the damage, work with their insurance company instead of filing through your own policy.
Choosing the right repair shop
I’ve found that mobile repair services often offer the best value. They typically charge less than traditional body shops because they have lower overhead costs. When picking a repair shop, I look for these qualities:
- Written warranties on all work
- Clear communication about repair methods
- Insurance coverage for fire and theft
- Positive customer reviews and ratings
- Experience with your car’s make and model
Comparing repair quotes
I always suggest getting at least three estimates before making a decision. Here’s my proven process for comparing quotes:
- Ask for detailed, itemized estimates
- Check if they use OEM, aftermarket, or used parts
- Compare labor rates between shops
- Look for hidden fees or additional charges
- Ask about warranty coverage
Remember, the lowest quote isn’t always the best choice. I’ve seen many cases where slightly higher estimates included better parts and longer warranties. Some shops offer cash payment discounts, which can save you 5-10% on your final bill.
For minor damage, ask about paintless dent repair (PDR). This technique often costs less than traditional repairs and maintains your car’s original finish. Some insurance companies even offer special discounts or waive deductibles for PDR services.
By following these guidelines, I’ve helped many car owners save hundreds of dollars on quality bumper repairs. The key is balancing cost with quality while making smart decisions about insurance claims and repair options.
After-Repair Care and Maintenance
Now that your car bumper repair is complete, I want to share my expert tips on maintaining that fresh repair job. With proper care, you’ll keep your bumper looking great and functioning safely for years to come.
Quality inspection checklist
I always tell my clients to check these crucial points after getting their bumper fixed:
- Paint match and finish consistency
- Panel alignment and gap spacing
- Sensor functionality and calibration
- Secure mounting and fasteners
- Smooth surface without ripples
- Even clear coat application
- Proper drainage holes clearance
Preventive care tips
I’ve learned that the first 90 days after repair are critical. Here’s what I recommend for the best results:
- Hand wash only with cool water and mild car soap
- Park in shaded areas away from trees
- Keep distance from other vehicles
- Clean bird droppings immediately
- Avoid automatic car washes
Remember to wait at least 60 days before applying any wax or polish. I’ve seen too many perfect repairs ruined by rushing this step.
Long-term protection methods
My years of experience have taught me that protection goes beyond basic cleaning. I recommend applying a high-quality automotive wax after the curing period. This adds an extra shield against UV rays and environmental damage.
For maximum protection, I suggest using paint protection film on high-impact areas. This invisible barrier stops rock chips and scratches before they happen. Think of it as insurance for your repair investment.
When cleaning your bumper, stick to microfiber cloths and gentle movements. I’ve found that circular motions work best for washing, while straight lines are ideal for drying. This technique prevents those annoying swirl marks that can make your bumper look old before its time.
Watch your parking habits too. I always pick spots away from high-traffic areas and avoid gravel roads when possible. These small changes make a big difference in keeping your bumper pristine.
Regular inspections matter more than you might think. I check my clients’ bumpers every few months for early signs of problems. This way, we catch minor issues before they turn into major headaches.
Conclusion
Car bumper repair requires careful attention to both safety and esthetics. Through my years of experience, I’ve seen how quick action on bumper damage saves money and prevents bigger problems later.
Professional repairs offer significant advantages - precise color matching, proper sensor calibration, and structural integrity checks that protect your investment. While DIY fixes might work for minor scratches, your car’s safety systems need expert handling.
Money-saving options exist without cutting corners on quality. Smart choices about insurance claims, repair shop selection, and timing can reduce costs while maintaining high standards. Right now is the perfect time to Schedule Repair and protect your vehicle’s value.
Regular maintenance after repairs keeps your bumper looking great and functioning safely. Simple steps like proper washing techniques, careful parking habits, and periodic inspections help maintain that fresh-from-the-shop appearance.
Remember, your car’s bumper serves as its first line of defense. Taking care of bumper damage promptly, choosing the right repair approach, and following proper maintenance will keep you and your passengers safe while preserving your car’s value.
## FAQs
-
How much does a typical car bumper repair cost? The cost of car bumper repair can vary widely depending on the extent of the damage. Minor scratches or dents might cost between $30-$100 for DIY repairs, while professional repairs for more significant damage can range from a few hundred dollars to $1,500 or more. It’s best to get multiple quotes from reputable repair shops to determine the exact cost for your specific situation.
-
When should I attempt to repair my car bumper myself? DIY repairs are suitable for minor cosmetic issues such as small surface scratches without paint damage, minor scuffs that haven’t cracked the bumper, tiny dents that haven’t affected the paint, and simple paint touch-ups on flat surfaces. However, for more significant damage or if your car has advanced driver assistance systems, it’s recommended to seek professional help.
-
How long does a professional car bumper repair typically take? Professional bumper repairs can usually be completed within a few hours to a day, depending on the extent of the damage and the repair techniques required. More complex repairs involving paint matching and sensor recalibration might take longer. It’s best to consult with the repair shop for a more accurate timeline based on your specific repair needs.
-
Will repairing my bumper affect my car’s resale value? A properly repaired bumper by a professional should not significantly affect your car’s resale value. In fact, addressing bumper damage promptly can help maintain your vehicle’s value. However, poor-quality repairs or unaddressed damage can decrease your car’s worth. It’s important to choose a reputable repair shop and keep documentation of the repairs for future reference.
-
How can I protect my car bumper after it’s been repaired? To protect your repaired bumper, follow these tips: hand wash your car with cool water and mild soap, park in shaded areas away from trees, maintain distance from other vehicles, clean bird droppings immediately, and avoid automatic car washes for at least 90 days after the repair. Additionally, consider applying a high-quality automotive wax after the curing period and using paint protection film for long-term protection.
-
Is it necessary to repair small scratches on my car bumper? While small scratches might seem insignificant, it’s generally a good idea to address them promptly. Even minor damage can lead to rust or paint peeling if left unattended, potentially resulting in more expensive repairs later. For small scratches, you might be able to use DIY methods, but consult a professional if you’re unsure about the extent of the damage.
-
How do I know if my car’s bumper sensors need recalibration after a repair? If your car has advanced driver assistance systems (ADAS) that use sensors in the bumper, these may need recalibration after a repair. Signs that recalibration might be necessary include false alerts from parking or collision systems, or malfunctioning features like adaptive cruise control or blind spot monitoring. It’s best to have a professional check and recalibrate these systems as part of the repair process.
-
Can I drive my car if the bumper is damaged but still attached? While you might be able to drive your car with a damaged bumper that’s still attached, it’s not recommended for safety reasons. A compromised bumper may not provide adequate protection in case of an accident. Additionally, driving with a damaged bumper could lead to further damage or potentially cause the bumper to detach while driving. It’s best to have the damage assessed and repaired as soon as possible.