Did you know that 52% of car owners have at least one visible scratch on their vehicle right now?
Those unsightly marks on your car’s surface can be frustrating. Whether it’s from a shopping cart, a careless driver, or that sneaky bush in your driveway, car paint scratches happen to everyone. But here’s something most people don’t know: not all scratches need expensive professional treatment.
We’ve spent years mastering car paint scratches repair techniques, and we’re ready to share our professional knowledge with you. From simple clear coat marks to deep paint damage, we’ll walk you through the exact methods professionals use in their body shops.
In this guide, we’ll break down different types of scratches, show you the tools experts use, and explain step-by-step repair methods that give amazing results. Let’s restore your car’s paint to its original glory!
Types of Car Paint Scratches
Let me walk you through the different types of car paint scratches I’ve encountered in my years of automotive repair. Understanding these variations is crucial for proper car paint scratches repair.
Surface-level clear coat scratches
The most common scratches I see are surface-level clear coat scratches. These marks only affect the transparent protective layer on top of your paint. When I run my fingernail across these scratches, it glides smoothly without catching. They appear as light swirl marks or faint lines, typically caused by improper washing or minor contact with dust and dirt.
Paint layer damage assessment
Moving deeper, we find paint layer damage. I can tell these scratches apart because they show the actual color coat damage. Here’s a simple way to check paint layer damage:
- Run your fingernail across the scratch - it will catch slightly
- Look for scuffed areas where paint is removed
- Check if the scratch reveals a different color underneath
- Notice if the damage feels deeper than surface swirls
Deep scratches reaching primer/metal
The most serious scratches I deal with reach the primer or bare metal. These demand immediate attention because they can lead to rust. When I examine these scratches, I see either white/gray (primer) or silver metallic colors (bare metal) exposed.
| Scratch Type | Visual Indicator | Touch Test | Risk Level |
|---|---|---|---|
| Clear Coat | Faint lines | Nail doesn’t catch | Low |
| Paint Layer | Color damage | Nail catches slightly | Medium |
| Primer/Metal | White/silver exposed | Deep groove felt | High |
I’ve found that identifying the correct type of scratch is half the battle won in car paint scratches repair. Each type needs a specific approach, and using the wrong repair method can make the damage worse. That’s why I always start with a thorough assessment before picking up any repair tools.
Required Tools and Materials
I always tell my clients that successful car paint scratches repair starts with having the right tools at hand. Let me share what I keep in my professional toolkit.
Professional repair equipment
For quality repairs, I rely on these essential tools:
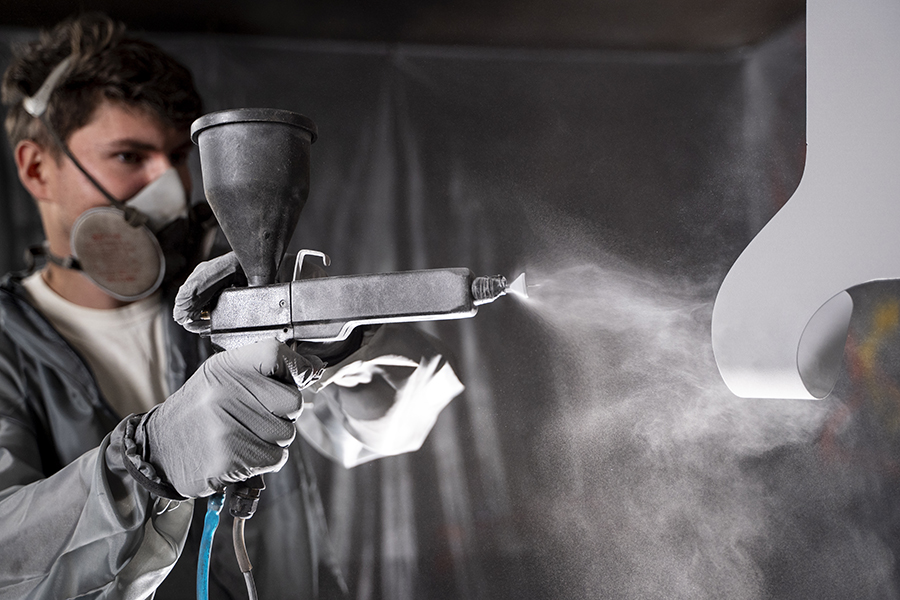
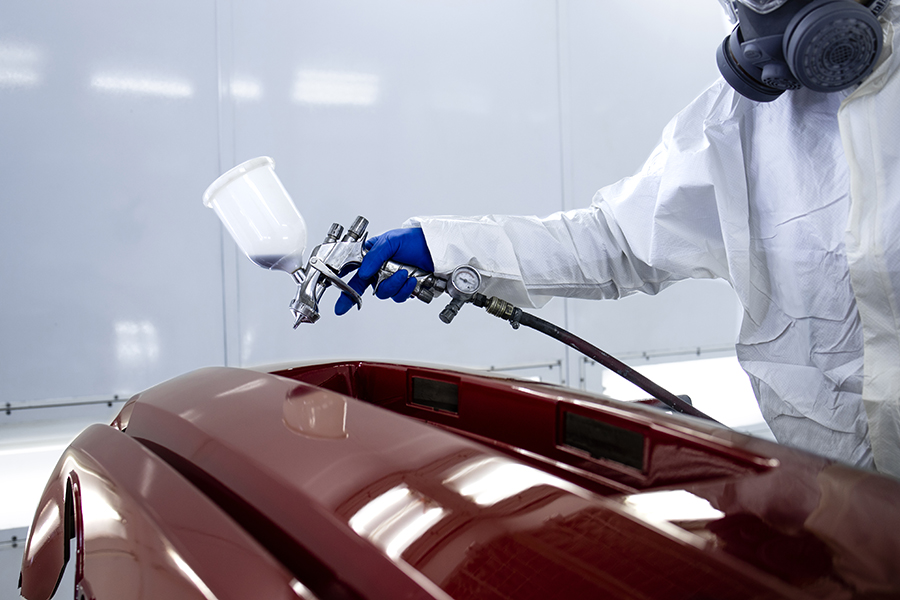
- Paint Application Tools: A professional-grade spray gun paired with an air compressor (minimum 60 PSI) gives the smoothest finish
- Surface Prep Equipment: Electric sanders and high-grit (1000-3000) wet/dry sandpaper for different scratch depths
- Finishing Tools: Orbital buffer with various pads for that showroom shine
Paint matching systems
Getting the right color match is critical. I use precision color-matching technology that identifies your exact paint code. Here’s what my paint station includes:
| Component | Purpose |
|---|---|
| Color Code Locator | Finds factory paint codes |
| Digital Color Scanner | Matches existing paint precisely |
| Paint Mixing System | Creates perfect color blends |
Safety equipment needed
Working with automotive paints requires serious protection. My basic safety setup includes:
- Respiratory Protection
- Professional-grade respirator with appropriate filters
- Dust masks for light sanding work
- Body Protection
- Chemical-resistant nitrile gloves
- Full-body coveralls
- Safety glasses meeting EN166 standards
- Workspace Protection
- Large tarp for floor coverage
- Masking tape and film for non-repair areas
I’ve learned through experience that investing in quality tools makes a significant difference in repair outcomes. While you might be tempted to cut corners, professional-grade equipment will save you time and deliver better results. Remember, these tools aren’t just about fixing the current scratch – they’re an investment in maintaining your car’s value.
Paint Repair Methods
Now that we’ve identified your scratch type and gathered our tools, I’m going to show you the exact methods I use for professional car paint scratches repair. With over 15 years of experience, these techniques have never let me down.
Clear coat restoration steps
For surface-level scratches, I start with a gentle approach. First, I clean the area with a specialized compound. Then, I apply the clear coat repair solution in thin, even layers. Here’s my proven process:
| Step | Action | Time |
|---|---|---|
| 1. Clean | Deep clean with compound | 5 mins |
| 2. Apply | Thin clear coat layer | 10 mins |
| 3. Dry | Let it cure completely | 30 mins |
| 4. Polish | Buff to match finish | 15 mins |
Base coat application techniques
When dealing with deeper scratches, I focus on perfect color matching and proper layering. My technique involves:
- Preparing the damaged area with 2000-grit wet sanding
- Applying color-matched paint in thin, overlapping passes
- Building up layers gradually for depth match
- Adding clear coat protection after full cure
Wet sanding procedures
I’ve found wet sanding to be crucial for professional results. The process requires patience and precision. Using 3000-grit sandpaper, I keep the surface wet while working in straight lines. Never use circular motions - this creates swirl marks that are hard to remove.
The key to success lies in the pressure applied. I maintain light, even pressure throughout the process. Between each pass, I clean the area thoroughly and check progress. This method works perfectly for blending repaired areas with existing paint.
Remember, these techniques require practice. I always test on a small area first. The results speak for themselves - a perfectly matched finish that looks factory-fresh. Through years of experience, I’ve learned that rushing any of these steps leads to subpar results.
Professional Repair Steps
After mastering the repair methods, I’m ready to share my professional secrets for flawless car paint scratches repair. The magic lies in the details of each step.
Surface preparation process
Temperature control makes or breaks a paint job. I keep my workspace between 20-25°C (68-77°F) for perfect results. Here’s my proven preparation routine:
- Clean with wax and grease remover
- Sand with 220-grit for bare metal areas
- Progress to 600-grit wet sanding
- Wipe with tack cloth between steps
Paint application methods
I’ve learned that paint application is an art of patience. The basecoat needs careful attention - I apply it in thin, even layers. My professional tip: float the paint rather than press it into the surface.
| Layer | Drying Time | Temperature |
|---|---|---|
| Base Coat | 20-30 mins | 20-23°C |
| Between Coats | 10-20 mins | 20-23°C |
| Final Layer | 20+ mins | 20-23°C |
Clear coat finishing techniques
The clear coat is your paint’s shield. I apply it with precision, using these professional steps:
- Mix clear coat according to manufacturer specs (typically 2:1 ratio)
- Apply first layer lightly - just enough to wet the surface
- Wait 10-20 minutes between coats
- Add second coat with more product at slower speed
- Let it cure completely before buffing
Warning: Never rush the clear coat process. I’ve seen countless DIY jobs fail because of impatience. The clear coat acts like a solvent - too much pressure will remove your basecoat.
I always test the paint’s hardness before final buffing. When it’s ready, I use rubbing compound (not polishing compound) for that showroom shine. Remember, machine polishing takes skill - too much pressure will burn through your fresh finish.
Quality Control and Finishing
The final stage of car paint scratches repair is where I make the difference between a good job and a perfect one. Let me share my professional secrets for achieving that factory-fresh finish.
Paint blending techniques
I start by creating a smooth transition between the repaired area and the existing paint. My technique involves working outward from the center of the repair in thin, overlapping passes. I mix my paint slightly thinner for the outer edges - this creates an invisible transition zone.
For metallic finishes, I pay special attention to the spray pattern. I hold my spray gun at a 75-degree angle and apply the paint in a cross-pattern. This matches the metallic flake arrangement of the factory finish perfectly.
Surface polishing methods
After the paint cures, I begin my three-stage polishing process:
- Initial cut with heavy compound
- Medium polish for clarity
- Fine polish for deep gloss
I’ve developed a specific technique for each stage. Moving the polisher at a steady pace, I work in sections no larger than 2x2 feet. The secret lies in the pressure - just enough to feel slight resistance against the paint surface.
Final inspection points
My final quality check follows this proven checklist:
| Inspection Area | What I Check For | Testing Method |
|---|---|---|
| Color Match | Perfect blend | Multiple light sources |
| Surface Level | No orange peel | Touch and sight test |
| Gloss Level | Uniform shine | Side-angle viewing |
| Paint Texture | Consistent feel | Hand assessment |
I examine my work under three different light sources: 1. Natural sunlight 2. LED shop lights 3. UV inspection lamp
The true test comes when I run my hand over the repaired area - I shouldn’t feel where the repair starts or ends. If I can detect the transition, I go back to fine polishing until it’s perfect.
My years of experience have taught me that rushing these final steps ruins hours of careful work. That’s why I take my time with each stage, making sure the repair meets my strict quality standards.
Conclusion
Car paint scratches repair demands attention to detail, proper tools, and tested techniques. My years working with damaged vehicles have taught me that successful repairs come from understanding scratch types, using professional-grade equipment, and following proven repair methods.
Many car owners feel overwhelmed by paint damage, but professional help is readily available. You can schedule repair service today and let experienced technicians restore your car’s finish to pristine condition.
Quality results require patience and expertise. My detailed guide shows the exact steps professionals take, from initial assessment through final polishing. Remember, rushing any stage of the repair process risks compromising the final result.
Professional paint repair protects your car’s value and appearance. Start with proper scratch assessment, gather the right tools, and take time with each repair step. Your car deserves careful attention to maintain its showroom shine for years to come.
## FAQs
-
How can I determine the severity of a scratch on my car’s paint? You can assess the severity of a scratch by running your fingernail across it. If your nail doesn’t catch, it’s likely a surface-level clear coat scratch. If it catches slightly, it may be paint layer damage. If you see white/gray (primer) or silver (metal) exposed, it’s a deep scratch reaching the primer or metal.
-
What are the essential tools needed for professional car paint scratch repair? Professional car paint scratch repair requires tools such as a spray gun with an air compressor, electric sanders, high-grit wet/dry sandpaper, an orbital buffer with various pads, a color-matching system, and safety equipment like respirators, gloves, and coveralls.
-
How important is temperature control during the paint repair process? Temperature control is crucial for a successful paint job. Professionals typically maintain a workspace temperature between 20-25°C (68-77°F) for optimal results. This helps ensure proper paint application and drying.
-
What’s the correct way to apply clear coat during scratch repair? To apply clear coat correctly, mix it according to manufacturer specifications (usually a 2:1 ratio). Apply the first layer lightly, just enough to wet the surface. Wait 10-20 minutes between coats, then apply a second coat with more product at a slower speed. Allow it to cure completely before buffing.
-
How do professionals ensure a perfect color match when repairing scratches? Professionals use precision color-matching technology to identify the exact paint code. This includes using a color code locator to find factory paint codes, a digital color scanner to match existing paint precisely, and a paint mixing system to create perfect color blends.
-
What’s the importance of wet sanding in the scratch repair process? Wet sanding is crucial for achieving professional results. It helps smooth out the repaired area and blend it with the existing paint. Professionals use 3000-grit sandpaper, keep the surface wet, and work in straight lines with light, even pressure.
-
How do professionals conduct a final quality check after repairing a scratch? Professionals use a checklist to inspect color match, surface level, gloss level, and paint texture. They examine the work under multiple light sources, including natural sunlight, LED shop lights, and UV inspection lamps. They also perform a touch test to ensure a seamless transition between the repaired area and the existing paint.
-
Is it possible to repair deep scratches that reach the primer or metal? Yes, deep scratches reaching the primer or metal can be repaired, but they require immediate attention to prevent rust. These repairs involve more extensive work, including proper surface preparation, primer application, color matching, and clear coat finishing.
-
How long does the paint repair process typically take? The duration of the repair process varies depending on the severity of the scratch and the number of layers that need to be applied. However, it generally involves multiple stages of application and drying times. For instance, each layer of base coat typically needs 20-30 minutes to dry, with 10-20 minutes between coats.
-
Can I attempt to repair car paint scratches myself, or should I always seek professional help? While minor surface scratches can potentially be addressed by careful DIY enthusiasts, deeper scratches or those requiring paint matching are best left to professionals. The process requires specialized tools, precise techniques, and experience to achieve a factory-quality finish and avoid potentially worsening the damage.