Did you know that the average car owner spends $800 to fix paint scratches at a body shop?
That’s a lot of money for damage that often happens in seconds - whether from a shopping cart, a careless driver, or those pesky branches in your driveway. We’ve seen hundreds of car owners panic at the sight of fresh scratches on their vehicles.
But here’s the good news: Many car paint scratches can be fixed at home with the right knowledge and tools. As professional auto technicians, we’ve developed a proven process for car repair paint scratches that works every time.
In this guide, we’ll show you our step-by-step method to fix those annoying scratches and restore your car’s finish to its original glory. From understanding different types of scratches to matching your car’s exact paint color, we’ll cover everything you need to know.
Ready to save money and learn how to fix those scratches like a pro? Let’s begin!
Understanding Car Paint Scratches
Let’s start by breaking down what we’re dealing with when it comes to car paint scratches. In our years of experience, we’ve found that understanding the structure of your car’s paint is crucial for proper repairs.
Different layers of car paint
Your car’s paint isn’t just one simple layer - it’s a carefully engineered system of protection. Here’s what we work with every day:
| Layer | Function | Characteristics |
|---|---|---|
| Clear Coat | UV protection & Shine | Thick, transparent |
| Base Coat | Color & Appearance | Thin, pigmented |
| Primer | Metal protection & Adhesion | Gray, protective |
| Metal/Body | Vehicle structure | Raw material |
Types of paint damage
In our repair shop, we see these common types of paint damage:
- Clear coat scratches - Most common and easiest to fix
- Base coat damage - Shows color removal
- Primer scratches - Most serious, shows metal
- Paint transfer marks - From contact with other objects
Assessing scratch depth
We use a simple but effective method to check scratch depth. Run your fingernail across the scratch - if it catches, that means the damage goes beyond the clear coat. If it feels smooth, you’re looking at surface-level damage only.
When examining scratches in our shop, we also look at these factors: - Color inside the scratch (white means deep, while dark means surface-level) - Reflection patterns under bright light - Whether bare metal is visible
This knowledge helps us pick the right repair approach. For example, light clear coat scratches need only polishing, while deeper scratches going into the base coat need more extensive work. We’ve seen how proper assessment saves both time and money in car repair paint scratches.
Required Tools and Materials
We’ve gathered all the essential tools needed for successful car repair paint scratches based on our extensive experience. Let’s break down everything you’ll need into three main categories.
Basic repair supplies
For minor scratch repairs, we recommend starting with these fundamental items:
| Tool | Purpose | Approximate Cost |
|---|---|---|
| Microfiber Cloths | Surface cleaning | $10-15 |
| Scratch Removal Compound | Surface repair | $15-20 |
| Paint Touch-up Kit | Color matching | $20-30 |
| Sandpaper (2000-grit) | Smooth finishing | $5-10 |
| Buffing Pads | Final polish | $15-20 |
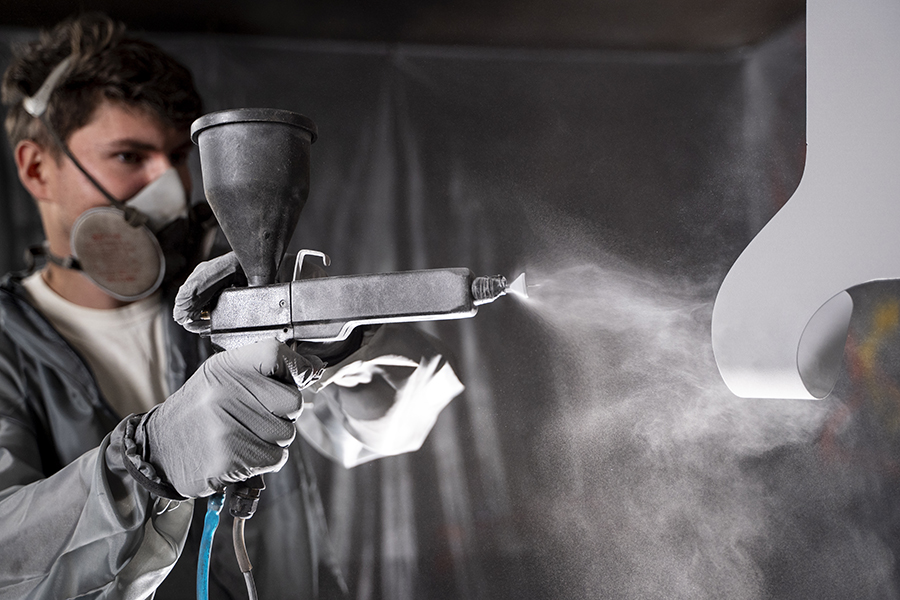
Professional-grade equipment
When working on deeper scratches, we find these professional tools make a real difference:
The DA Power System ($30-40) stands out as our top choice for serious repairs. We pair this with a quality orbital polisher for the best results. For proper paint application, a good air compressor with at least a 60-gallon tank capacity proves invaluable.
Safety equipment
Working with automotive paint requires proper protection. Here’s what we always use:
- Chemical respirator mask for paint fumes
- Safety goggles for eye protection
- Chemical-resistant gloves
- Well-ventilated workspace or paint booth
- Proper lighting setup with full-spectrum bulbs
We’ve learned through experience that investing in quality tools saves money in the long run. While the initial cost might seem high, having the right equipment prevents costly mistakes during car repair paint scratches.
Remember, these tools aren’t just about fixing the scratch - they’re about achieving professional-quality results. We’ve seen too many DIY jobs go wrong because of inadequate tools. That’s why we recommend getting the right equipment before starting any repair work.
Step-by-Step Repair Process
Now that we have our tools ready, let me walk you through our proven process for fixing car paint scratches. After fixing thousands of scratches, we’ve refined these steps to get the best results every time.
Surface preparation
The success of your repair depends heavily on proper preparation. We start by thoroughly washing the damaged area with car soap and water. Here’s what makes our preparation method different:
- Clean with isopropyl alcohol to remove wax and oils
- Work in a shaded area to prevent premature drying
- Use clay bar treatment to remove embedded contaminants
- Sand carefully with 2000-grit paper for smooth surface
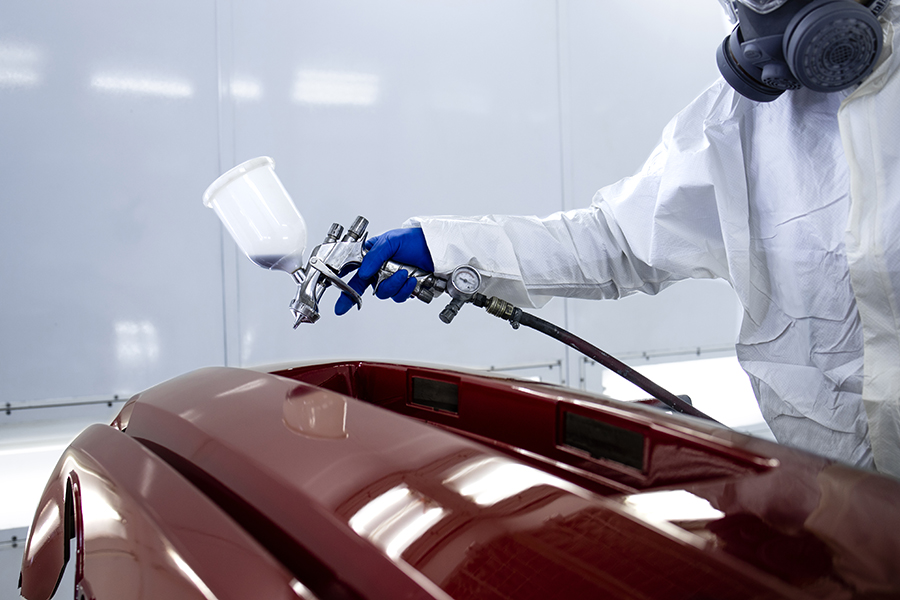
Paint application techniques
We follow a systematic approach to paint application that gives consistent results:
| Step | Technique | Drying Time |
|---|---|---|
| Primer | Light, even coats | 20+ minutes |
| Base coat | Thin layers, start from top | 20-30 minutes |
| Clear coat | Float over base coat | 30+ minutes |
Pro tip: We always test the paint on a hidden spot first to check the color match.
Finishing and buffing
The final stage makes all the difference between an amateur and professional-looking repair. We start buffing only after the clear coat has dried completely - usually waiting three full days.
For the perfect finish, we use a dual-action polisher set to low speed first. Working in small circular motions, we gradually increase the RPMs as needed. The key is applying steady, moderate pressure while keeping the buffer moving.
Important: We never rush the buffing process. Taking time here brings out that showroom shine and makes the repair blend perfectly with the surrounding paint.
Remember, patience during each step leads to better results. We’ve seen how rushing through any of these stages can turn a simple car repair paint scratch into a bigger problem.
Paint Matching and Blending
Perfect paint matching is what makes the difference between a visible repair and one that looks factory-fresh. We’ve spent years perfecting our paint matching process, and now we’ll share our secrets with you.
Finding your car’s paint code
The first step in matching your paint is finding the correct color code. Every manufacturer places this code in different locations:
| Manufacturer | Common Code Location |
|---|---|
| Toyota/Lexus | Driver’s door jamb |
| Ford/Lincoln | Door jamb or dash |
| GM Vehicles | Inside door frame |
| BMW/Mercedes | Under hood area |
Important: Write down both the color code and any additional numbers next to it - they matter for exact matching.
Color testing methods
We always test our paint match before applying it to your car. Here’s how we do it:
- Use a spectrophotometer to measure existing paint color
- Mix small test batches based on measurements
- Apply paint to test panels (both black and white sections)
- Check color under different lighting conditions
- Make small adjustments until we get a perfect match
Blending techniques
The real magic happens in the blending process. We start by preparing a wider area than just the scratch itself. Our technique involves applying thin, overlapping layers that gradually fade into the existing paint.
When we blend, we work in three distinct zones: 1. The repair area - full coverage 2. The transition zone - gradually reducing coverage 3. The fade-out area - very light misting
Pro tip: We keep our spray gun moving constantly and maintain consistent pressure throughout the process. This prevents hard lines and creates that seamless finish you’re looking for.
The temperature and humidity in our work area make a big difference too. That’s why we maintain strict climate control when we’re matching and blending paint. Too hot, and the paint dries too fast. Too cold, and it won’t flow properly.
Remember those tools we talked about earlier? This is where your investment in quality equipment really pays off. A good spray gun and proper lighting are absolutely necessary for successful blending.
Common Mistakes to Avoid
In our decades of experience fixing car paint scratches, we’ve seen countless DIY attempts gone wrong. Let’s look at the most common mistakes that can turn a simple scratch repair into a costly nightmare.
Wrong repair approach
The biggest mistake we see is misdiagnosing the scratch depth. Here’s what happens when you get it wrong:
| Mistake | Consequence |
|---|---|
| Using polish on deep scratches | Makes scratch more visible |
| Applying touch-up paint to surface scratches | Creates raised areas |
| Skipping primer on bare metal | Paint peels within weeks |
Improper tool usage
We’ve fixed many cars damaged by incorrect tool handling. Never use household brushes for paint application - they’re too thick and leave visible streaks. The right automotive touch-up brush makes all the difference.
When using sanders or buffers, maintain consistent pressure. We’ve seen how uneven pressure creates swirl marks that are harder to fix than the original scratch.
Key mistakes with tools: * Using wrong sandpaper grit sequence * Holding buffer in one spot too long * Applying excessive pressure during polishing * Using contaminated applicators
Poor preparation
Poor preparation ruins even the best paint job. We’ve learned that 80% of failed repairs trace back to inadequate surface prep. Temperature and humidity control matter more than you think - we never paint when humidity exceeds 60% or temperature falls below 60°F.
Working in direct sunlight is another common error. The heat makes paint dry too quickly, creating uneven texture. We always work in a controlled environment or at least in shade.
The paint needs proper time to cure between coats. Rushing this process leads to paint failure. We wait at least 20 minutes between coats, even when time pressure builds up. Remember, a proper repair job can’t be rushed.
Paint matching deserves special attention. Many DIYers try finding an exact match, but car colors vary slightly. We mix colors to match, considering how sunlight affects the final appearance.
Most critical warning: If you see bare metal, don’t skip the primer. We’ve fixed too many cars where paint started peeling because someone tried to save time by skipping this crucial step.
Conclusion
Car paint scratch repair requires attention to detail, proper tools, and careful execution. Through our years of experience, we’ve seen how following the right process makes the difference between a visible repair and one that looks factory-fresh.
Professional-quality results come from understanding paint layers, using appropriate tools, and taking time with each repair step. While many scratches can be fixed at home, deeper damage needs expert attention - we recommend you Schedule Repair service for complex cases.
Remember these key points: proper surface preparation prevents future problems, exact paint matching matters more than speed, and patience during the repair process pays off. Whether fixing a small clear coat scratch or addressing deeper paint damage, following our proven methods will help restore your car’s appearance.
Most importantly, avoid rushing the repair process. Quality work takes time, but the results are worth it when your car looks as good as new. Keep these guidelines handy for your next paint repair project, and you’ll achieve results that make you proud.
## FAQs
-
How can I determine the depth of a car paint scratch? To assess the depth of a car paint scratch, run your fingernail across it. If your nail catches in the scratch, it likely goes beyond the clear coat. If it feels smooth, it’s probably just surface-level damage. You can also look at the color inside the scratch - white indicates a deeper scratch, while dark suggests surface-level damage.
-
What basic supplies do I need for minor car paint scratch repairs? For minor scratch repairs, you’ll need microfiber cloths for cleaning, scratch removal compound, a paint touch-up kit for color matching, 2000-grit sandpaper for smooth finishing, and buffing pads for final polishing. These basic supplies typically cost between $65 to $95 in total.
-
How long should I wait between applying coats of paint during a repair? It’s crucial to allow proper drying time between coats. We recommend waiting at least 20-30 minutes between applying primer, base coat, and clear coat. Rushing this process can lead to paint failure, so patience is key for a successful repair.
-
What’s the importance of paint matching in car scratch repair? Paint matching is critical for achieving a repair that blends seamlessly with the surrounding area. It involves finding your car’s exact paint code, using color testing methods like spectrophotometers, and applying blending techniques. Proper paint matching makes the difference between a visible repair and one that looks factory-fresh.
-
What are some common mistakes to avoid when repairing car paint scratches? Common mistakes include misdiagnosing scratch depth, using the wrong repair approach (like using polish on deep scratches), improper tool usage (such as using household brushes for paint application), poor surface preparation, and skipping primer on bare metal. Also, avoid working in direct sunlight or rushing the repair process.
-
How do professional auto technicians blend repaired areas with existing paint? Professional blending involves working in three zones: the repair area with full coverage, a transition zone with gradually reducing coverage, and a fade-out area with very light misting. Technicians keep the spray gun moving constantly and maintain consistent pressure to prevent hard lines and create a seamless finish.
-
Is it possible to repair all types of car paint scratches at home? While many scratches can be fixed at home with the right tools and knowledge, deeper damage or complex cases may require professional attention. It’s important to accurately assess the damage and know your limits. For scratches that expose bare metal or require extensive work, it’s often best to seek professional repair services.
-
How long does it take for a repaired car paint scratch to fully cure? The curing time can vary depending on the depth of the repair and environmental conditions. However, for a complete repair including clear coat application, it’s generally recommended to wait at least three full days before buffing or polishing the repaired area. This ensures the paint has fully hardened for the best results.